1. Configure channels…
ctrl–T
This is the very first command you have execute to establish a contact with the generator. The generator reports which output modules are installed and invokes a dialog to associate the waveforms with the output channels.
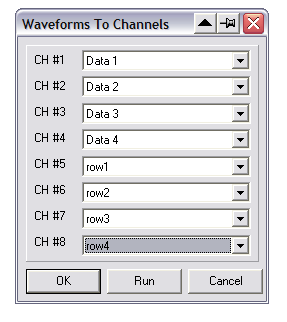
The default button in this dialog is RUN which automatically sends all data to the generator and starts it. You may also exit the dialog without starting or sending data.
This command will also cancel the red error LED on the controller panel if such is turned on.
Use this command to cancel the red error LED on the controller panel.
2. Disconnect
Terminate connection with the generator. Useful to inform the program that the generator has been reseted, and also to inhibit updating the generator memories when a large number of changes are about to be performed and the generator should not follow (alternatively – switch the updating mode to manual).
3. Run
ctrl–R
The same as RUN button. Start the generation of the waveforms. It is enabled only when the data has been downloaded to the generator.
4. Stop
ctrl–H
The same as STOP button.
Terminate the generation of the waveforms after the end of the current scan.
5. Send all
ctrl–E
Same as SEND ALL button.
Send all data to the generator. After execution of this command, the RUN command will be enabled.
If you chose this command when the generator is running, it will be stopped, all data downloaded and the generator restarted.
6. Update now
Use this command to update the data in the generator if the MANUAL UPDATE mode is chosen.
7. Auto update
All changes you make to the waveforms will immediately be transmitted to the generator if a contact has been established and all data downloaded.
This is the default choice.
8. Manual update
The changes will not be transmitted to the generator. The text on the button will change to UPDATE NOW. Use this option if you want to make many changes before you update the data in the generator.
9. Continuous mode
The Run command or the high level on the X-TRG input (if enabled) initiates the continuous generation of the waveforms.
This is the default choice.
10. Continuous & frame cnt
In this mode the RUN command starts a 32-bit frame counter. After a STOP command, the total number of generated frames is displayed in an editable field of a dialog. The number is selected and can directly be cut and pasted to a file/spreadsheet, etc. Editing this number does not have any effect.
11. Burst mode
The Run command or the high level on the X-TRG input (if enabled) initiates a single generation of the waveforms. The generator will stop after the end of waveform. Implemented in hardware – no constrains on the pulse width nor frame length.
12. Burst and invert
It is analogous to the normal BURST command, except that amplitudes of all waveforms are inverted after each burst. Implemented in hardware.
13. Burst N frames
Selecting the mode invokes a dialog to set the requested number of frames. Pressing RUN button starts the burst. This mode is a software extension and there are some restrictions. If the width of the last pulse is less than 21 μs then N+1 frames will be generated. Avoid frames shorter than about 500 μs.
14. Script [ Roll ]…
Programmable burst mode with waveform rolling described in separate Chapter.
15. Matrix mode
The mode corresponding to the MATRIX menu which is described in separate Chapter.
16. Computer in control
The RUN and STOP commands control the generator.
This is the default choice.
17. External triggering
The generator is controlled by the signal supplied to the X-TRG input on the front panel of the Control module. Low level (or short to ground) corresponds to the RUN command and high level (TTL compatible) corresponds to the STOP command.
18. Special » Force reset
It is possible to reset the generator by a menu command. The advantage of this feature is that the program becomes aware that the generator has been restarted and adjusts its menus accordingly.
19. Special » Firmware revision
Displays the revision number of the microprocessor software stored in controller’s read-only memory.