1. Point the IR-probe towards a surface with a low constant temperature, e.g. the black surface on top of the Scanner table.
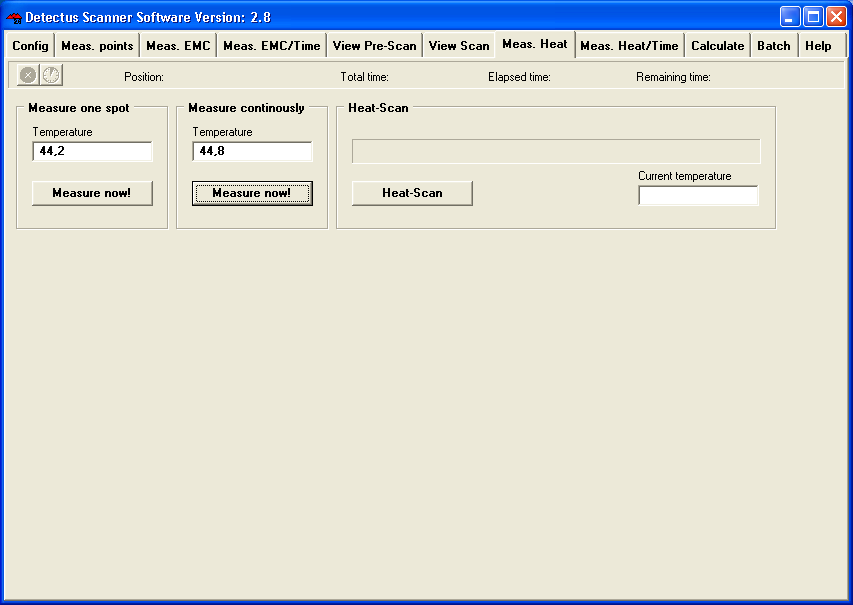
2. Click on the Meas. Heat tab.
3. In the Measure Continuously box, click on the button Measure Now button.

4. Make notes on the temperature reading on the screen and the temperature reading on the LCD display of the IR-probe.
5. Now point the IR-probe towards a surface with a high constant temperature.
6. Make notes on the temperature reading on the screen and the temperature reading on the LCD display of the IR-probe.
7. Calculate the new calibration gain using this formula: SCR1 = Low temperature shown on the screen.
LCD1 = Low temperature shown on the LCD display of the IR-probe.
SCR2 = High temperature shown on the screen.
LCD2 = High temperature shown on the LCD display of the IR-probe.
New calibration gain = (LCD2 - LCD1)/ (SCR2 - SCR1)*Old calibration gain
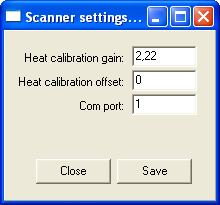
8. Cick on the Config tab.
In the Scanner box, click on the Edit button to show the next dialog box.

9. Enter the new Heat Calibration gain
10. Click on the Save button.
11. Click on the Close button.
12. Repeat the procedure until (LCD2 - LCD1)/ (SCR2 - SCR1) is near one.