In the Scanner table of the HR Scanner there is a built-in transmitter that emits at 120MHz from two beacons located in the upper left corner of the grid on the Scanner table.
By using the SMA connector on the left side of the Scanner table, you can connect an external signal source that emits at a different frequency.
The purpose of the beacons is to calibrate the position of the near field probes in X and Y-axis. The two beacons are designed for different types of probes.
Click on the “Calibrate to Beacon button”

1. A dialog with 8 steps will guide you through the calibration process.
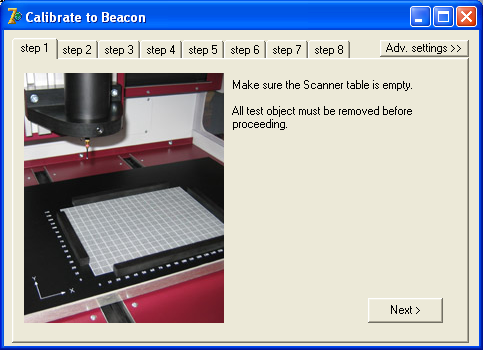
Step 1 : Make sure the Scanner table is empty.
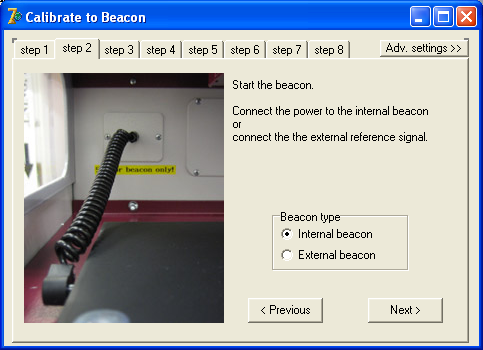
2. Step 2 : Choose and connect the internal or external calibration signal source.
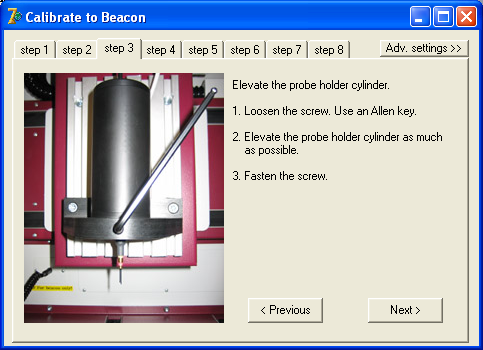
3. Step 3 : This is for safety to prevent the probe from running into the Scanner table.
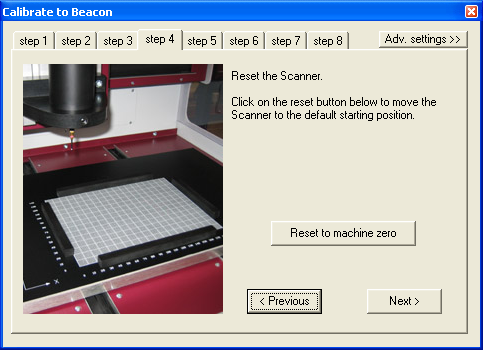
4. Step 4 : Click the button “Reset to machine zero”. The Scanner resets and moves down to Z=0. The Scanner table must be empty.
5. Step 5 : Lower the probe holder cylinder. An easy way to calibrate the Z-axis is to use a thickness gauge between the tip of the probe and the table.
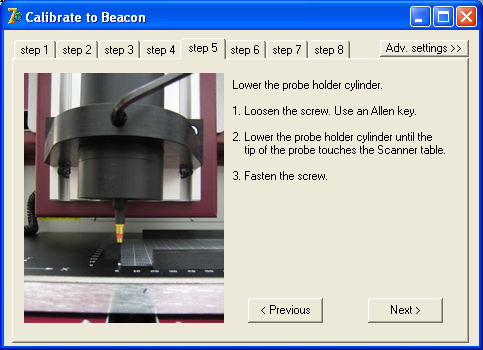
6. Step 6
Depending on the type of near field probe being used onr of the two beacons needs to be selected.
Beacon 1 is a vertical coil that works for H-field probes that are sensitive to a vertical field typically horizontal loop probes. This beacon also works for E-field probes. Beacon 2 is two crossed horizontal wires that work for H-field probes that are sensitive to a horizontal field typically vertical loop probes.
For best performance, a vertical loop probe must be rotated
so that the plane of the loop is aligned with the X or Y-axis.
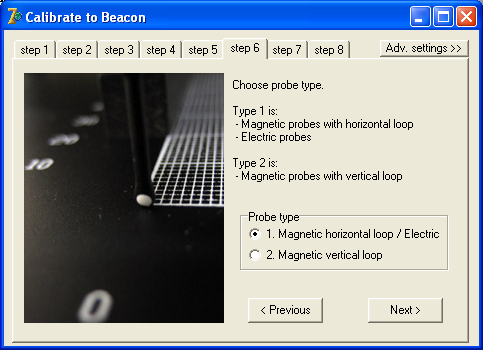
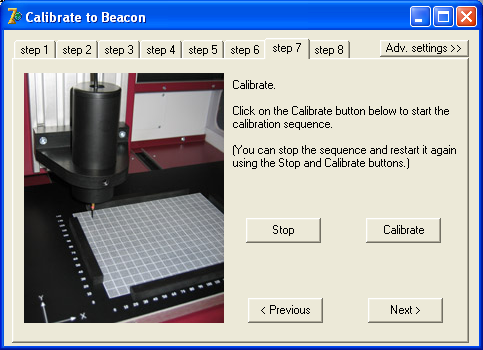
7. Step 7 : Click on the Calibrate button to start the calibration sequence.The calibration will take between one and ten minutes depending on the speed of the spectrum analyzer. When the calibration is done you will be given a choice to move the probe to X0Y0Z0. It is recommended to do so. This is a chance to verify that the probe is correctly calibrated. If the calibration was successful the tip of the probe should be position directly above X0Y0. If the calibration if off you may need to adjust the starting position of the calibration. This can be done in the advanced settings. See below.
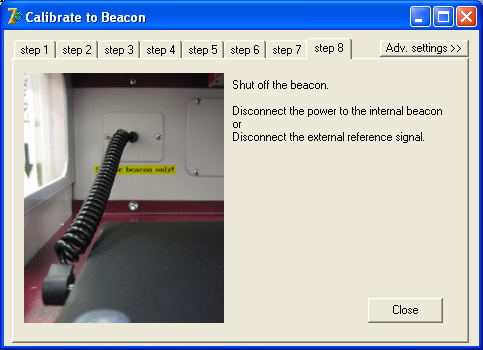
8. Step 8
Don’t forget to disconnect the calibration signal source
Advanced settings:
Clicking on “Advanced Settings” opens the dialog shown below. With these settings you can fine tune the calibration settings
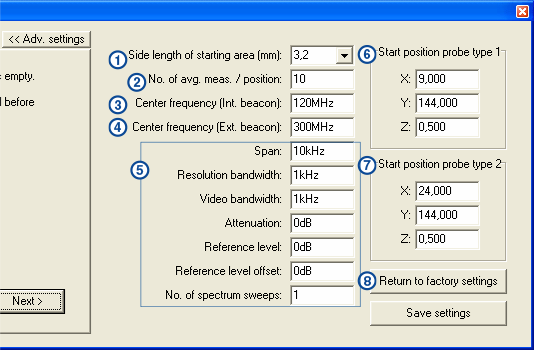
1. Side length of starting area
The Scanner will search for the beacon in smaller and smaller squares. This is the size of the first big square.
Default value is 3.2mm
2. No. of avg. meas. / position
These are the number of measurements made at each measuring position, from which the average value is calculated. More measurements will give a more accurate result but will take longer. Default value is 10 measurements.
3. Center frequency (Int. beacon)
This is the frequency that will be measured when selecting Internal beacon in step 2 above. Default value is 120MHz
4. Center frequency (Ext. beacon)
This is the frequency that will be measured when selecting External beacon in step 2 above. Default value is 300MHz
5. Spectrum analyzer settings
These are the setting that will be used when searching for the beacon.
6. Start position probe type 1
These are the coordinates of the point around which we will start to search for the beacon when type 1 is selected in step 6 above.
7. Start position probe type 2
These are the coordinates of the point around which we will start to search for the beacon when type 2 is selected in step 6 above.
8. Return to factory settings
Click here to return to factory default settings.