This chapter will guide you, step by step, through making a spot EMC measurement over a period of time.
1. Start the software by clicking on the icon on your desktop.
2. After a few seconds, this dialog box will show.

3. Click on Yes to reset the Scanner to its starting position at coordinates X0 Y0 Z10.
4. Position and calibrate the IR-probe according to the procedure in “Positional calibration of the IR-probe”.
5. Click on the Meas. EMC/Time tab.
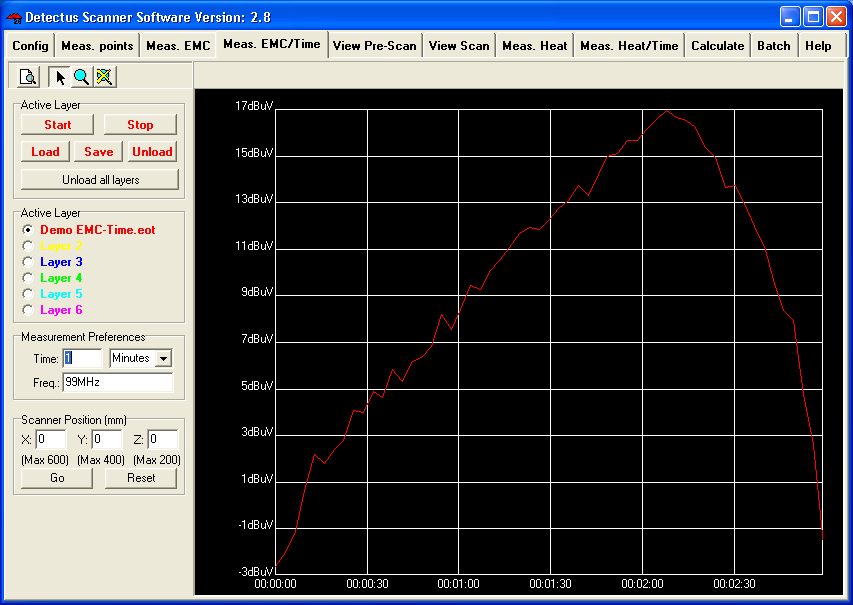
6. Enter the desired coordinates into Scanner Position (mm) box, and click on the Go button to move the Scanner and place the near field probe above the spot you want to measure.
7. In Measurement Preferences enter the total measuring time in the Time box.
8. In Measurement Preferences enter the desired frequency in the Frequency box. Allowed units are Hz, kHz, MHz and GHz.
9. In the Active Layer box, select a colored layer.
10. Start the measurement by clicking on the Start button.
11. When the measurement is finished you can click on the Save button to save the measurement as a .EOT file.
(Saving is optional but you will find it useful when you want to repeat a measurement and compare the results.)