These keys are mainly used for opening fixed menus from which further selections can be made by means of the softkeys or the cursor/select keys.
Input A (B)
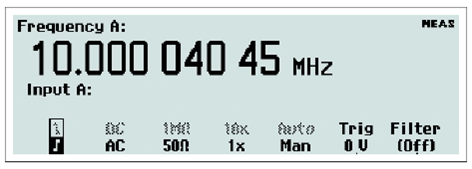
By depressing this key, the bottom part of the display will show the settings for Input A (B).
The active settings are in bold characters and can be changed by depressing the corresponding softkey below the display. You can also move the cursor, indicated by text inversion, to the desired position with the RIGHT/LEFT arrow keys and then change the active setting with the ENTER key.
The selections that can be made using this menu are:
- Trigger Slope: positive or negative, indicated by corresponding symbols
- Coupling: AC or DC
- Impedance: 50 W or 1 MW
- Attenuation: 1x or 10x
- Trigger:1 Manual or Auto
- Trigger Level:2 numerical input via front panel keyboard. If Auto Trigger is active, you can change the default trigger level manually as a percentage of the amplitude.
- Filter:3 On or Off
Notes: Always Auto when measuring risetime or falltime
The absolute level can either be adjusted using the up/down arrow keys or by pressing ENTER to reach the numerical input menu.
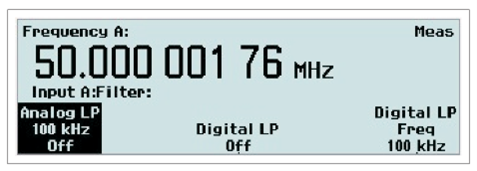
Pressing the corresponding softkey or ENTER opens the Filter Settings menu. See Fig. 2-10. You can select a fixed 100 kHz analog filter or an adjustable digital filter. The equivalent cutoff frequency is set via the value input menu that opens if you select Digital LP Frequency from the menu.
Input B
The settings under Input B are equal to those under Input A.
Settings
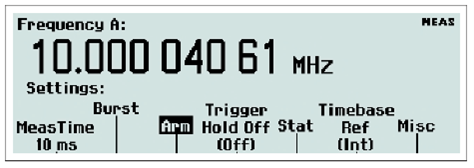
This key accesses a host of menus that affect the measurement. The figure above is valid after changing the default measuring time to 10 ms.
Meas Time
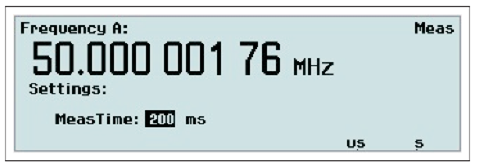
This value input menu is active if you select a frequency function. Longer measuring time means fewer measurements per second and gives higher resolution.
Burst
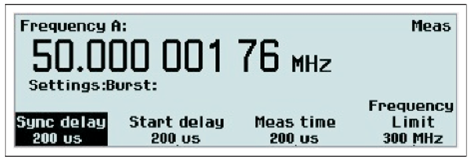
This settings menu is active if the selected measurement function is BURST - a special case of FREQUENCY - and facilitates measurements on pulse-modulated signals. Both the carrier frequency and the modulating frequency - the pulse repetition frequency (PRF) - can be measured, often without the support of an external arming signal.
Arm
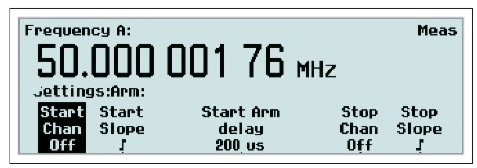
Arming is the general term used for the means to control the actual start/stop of a measurement. The normal free-running mode is inhibited and triggering takes place when certain pretrigger conditions are fulfilled.
The signal or signals used for initiating the arming can be applied to three channels (A, B, E), and the start channel can be different from the stop channel. All conditions can be set via this menu.
NOTE: Stop Delay can only be used for realizing the function Timed Totalize in the CNT-91(R).
Trigger Hold-Off
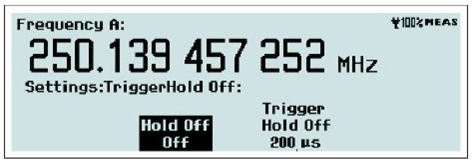
A value input menu is opened where you can set the delay during which the stop trigger conditions are ignored after the measurement
start. A typical use is to clean up signals generated by bouncing relay contacts.
Statistics
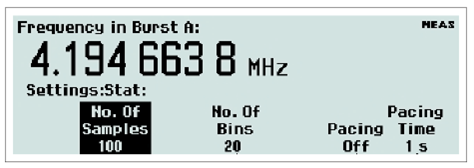
In this menu you can do the following:
- Set the number of samples used for calculation of various statistical measures.
- Set the number of bins in the histogram view.
- Pacing
The delay between measurements, called pacing, can be set to ON or OFF, and the time can be set within the range 2 ms - 500 s.
Timebase Reference

Here you can decide if the counter is to use an Internal or an External timebase. A third alternative is Auto. Then the external timebase will be selected if a valid signal is present at the reference input. The EXT REF indicator at the upper right corner of the display shows that the instrument is using an external timebase reference.
Miscellaneous

The options in this menu are:
- Smart Measure with submenus:
- Smart Time Interval (valid only if the selected measurement function is Time Interval) The counter decides by means of timestamping which measurement channel precedes the other.
- Smart Frequency (valid only If the selected measurement function is Frequency or Period Average) By means of continuous timestamping and regression analysis, the resolution is increased for measuring times between 0.2 s and 100 s.
- Input C Acquisition (CNT-90XL only) Auto means that the whole specified frequency range is scanned for valid input signals.
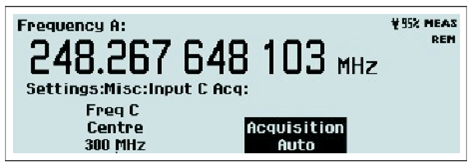
Manual means that a narrow band around the manually entered center frequency is monitored for valid input signals. This mode is compulsory when measuring burst signals but is also recommended for FM signals, when the approximate frequency is known. An additional feature is that the measurement results are presented much faster, as the acquisition process is skipped.
NOTE: Signal frequencies outside the manual capture range may cause erroneous results. In order to draw the operator's attention to this eventuality, the sign "M.ACQ" is visible in the upper right corner of the display.
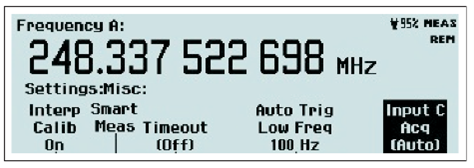
- Auto Trig Low Freq: In a value input menu you can set the lower frequency limit for automatic triggering and voltage measurements within the range 1 Hz - 100 kHz. A higher limit means faster settling time and consequently faster measurements.
- Timeout: From this submenu you can activate/deactivate the timeout function and set the maximum time the instrument will wait for a pending measurement to finish before outputting a zero result. The range is 10 ms to 1000 s.
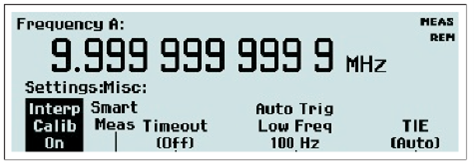
- Interpolatator Calibration: By switching off the interpolator calibration, you can increase the measurement speed at the expense of accuracy.
- TIE (CNT-91 only): From a submenu you can either let the counter choose the reference frequency automatically (Auto) or enter it manually.
Math/Limit
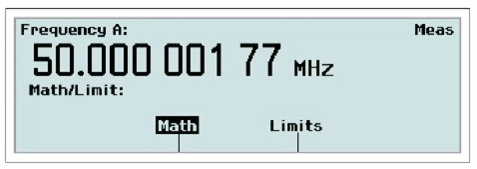
You enter a menu where you can choose between inputting data for the Mathematics or the Limits postprocessing unit.
The Math branch is used for modifying the measurement result mathematically before presentation on the display. Thus you can make the counter show directly what you want without tedious recalculations, e.g. revolutions/min instead of Hz.
The Limits branch is used for setting numerical limits and selecting the way the instrument will report the measurement results in relation to them.
Let us explore the Math submenu by pressing the corresponding softkey below the display.
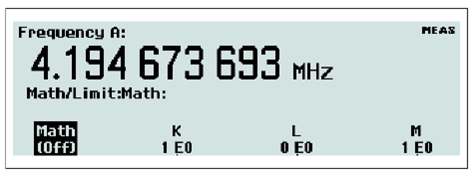
The display tells you that the Math function is not active, so press the Math Off key once to open the formula selection menu.
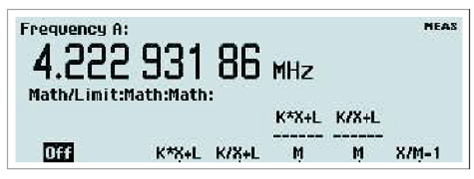
Select one of the five different formulas, where K, L and M are constants that the user can set to any value. X stands for the current non-modified measurement result.

Each of the softkeys below the constant labels opens a value input menu like the one below.
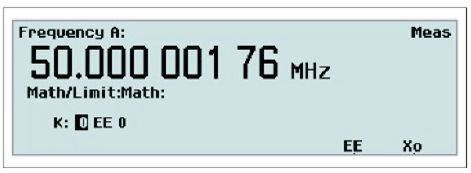
Use the numeric input keys to enter the mantissa and the exponent, and use the EE key to toggle between the input fields. The key marked X0 is used for entering the display reading as the value of the constant.
The Limit submenu is treated in a similar way, and its features are explored beginning on page 6-6.
User Options
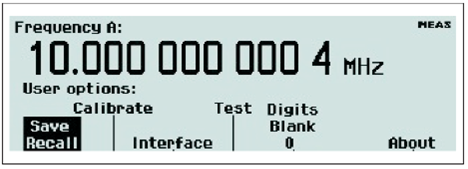

From this menu you can reach a number of submenus that do not directly affect the measurement. You can choose between a number of modes by pressing the corresponding softkey.
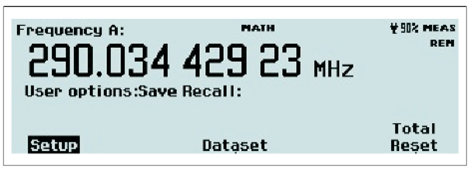
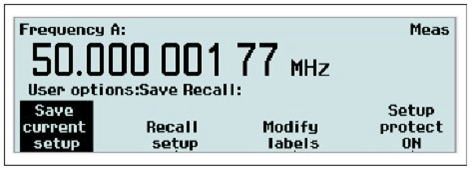
Save/Recall Menu
Twenty complete front panel setups can be stored in non-volatile memory. Access to the first ten memory positions is prohibited when Setup Protect is ON. Switching OFF Setup Protect releases all ten memory positions simultaneously.
The different setups can be individually labeled to make it easier for the operator to remember the application.
The following can be done:
- Save current setup
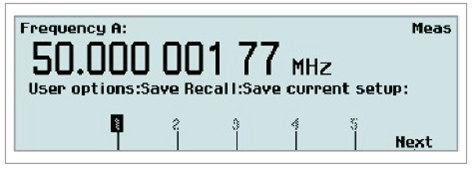
Browse through the available memory positions by using the RIGHT/LEFT arrow keys. For faster browsing, press the key Next to skip to the next memory bank. Press the softkey below the number (1-20) where you want to save the setting.
- Recall setup
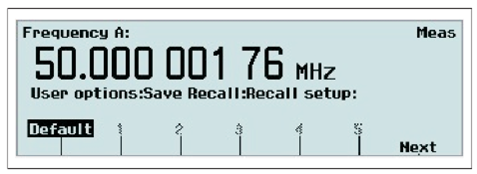
Select the memory position from which you want to retrieve the contents in the same way as under Save current setup above. You can also choose Default to restore the preprogrammed factory settings. See the table on page 2-19 for a complete list of these settings.
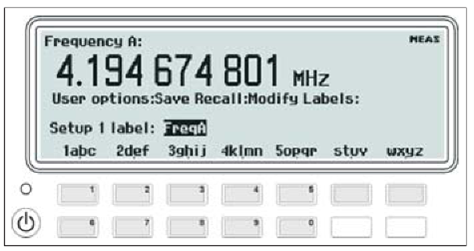
- Modify labels
Select a memory position to which you want to assign a label. See the descriptions under Save/Recall setup above. Now you can enter alphanumeric characters from the front panel. See the figure below.
The seven softkeys below the display are used for entering letters and digits in the same way as you write SMS messages on a cell phone.
- Setup protection
Toggle the softkey to switch between the ON/OFF modes. When ON is active, the memory positions 1-10 are all protected against accidental overwriting.
Dataset Menu
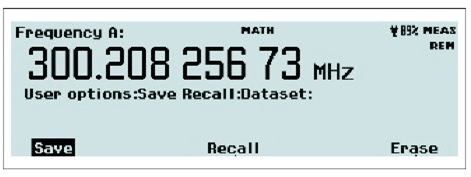
This feature is available in statistics mode only, and if HOLD has been pressed prior to initiating a measurement with RESTART. Up to 8 different datasets can be saved in FLASH memory, each containing up to 32000 samples. If the pending measurement has more than 32000 samples, only the last 32000 will be saved. A default label will be assigned to the dataset. It can be changed in a similar way as the setup labels. See Modify labels above.
- Save: Select a memory position, accept or change the name, and press OK.
- Recall: Select a memory position and press OK.
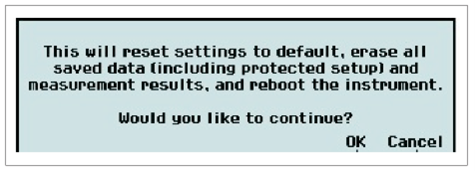
- Total Reset: The safety screen below will appear. Pressing OK will restore all factory settings and erase all user information.
Calibrate Menu
This menu entry is accessible only for calibration purposes and is password-protected.
Interface Menu
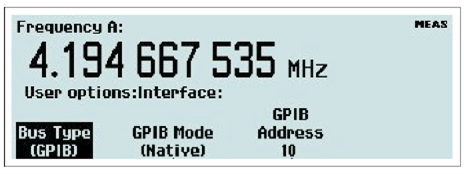
Select the active bus interface. The alternatives are GPIB and USB. If you select GPIB, you are also supposed to select the GPIB Mode and the GPIB Address. See the next two paragraphs.
GPIB Mode
There are two command systems to choose from.
- Native: The SCPI command set used in this mode fully exploits all the features of this instrument series.
- Compatible: The SCPI command set used in this mode is adapted to be compatible with Agilent 53131/132/181.
GPIB Address
Value input menu for setting the GPIB address.
Test
A general self-test is always performed every time you power-up the instrument, but you can order a specific test from this menu at any time.
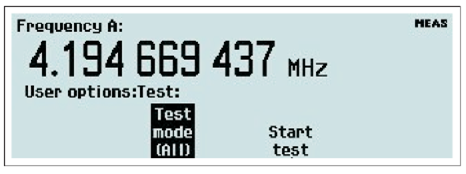
Press Test Mode to open the menu with available choices.
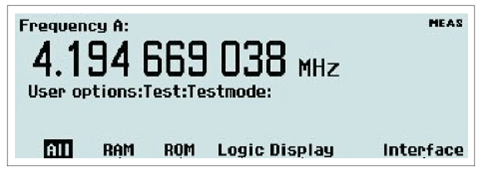
Select one of them and press Start Test to run it.
Digits Blank
Jittery measurement results can be made easier for an operator to read by masking one or more of the LSDs on the display.
Place the cursor at the submenu Digits Blank and increment/decrement the number by means of the UP/DOWN arrow keys, or press the soft key beneath the submenu and enter the desired number between 0 and 13 from the keyboard. The blanked digits will be represented by dashes on the display. The default value for the number of blanked digits is 0.
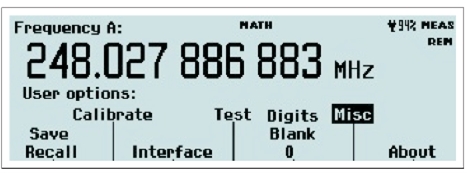
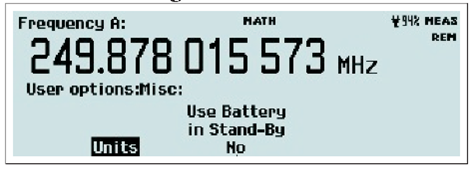
Misc (CNT-90XL & CNT-90 with Option 23/90)
The CNT-90XL without Option 23/90 has a single submenu called Units. By pressing this softkey you get to the submenu Power. Press Power and then select dBm or W as the unit of measurement, when either of the functions Frequency C or Power C is selected from the MEAS FUNC menu.
The CNT-90 with Option 23/90 has a single submenu called Use Battery in Standby. By toggling this softkey you can decide if the internal OCXO will remain powered or not when you turn off the instrument in battery operation mode.
The CNT-90XL with Option 23/90 has a combination of the two submenus mentioned above. See the figure below.
Output [CNT-91(R) only]
The rear panel pulse output can be used for three different purposes:
- pulse generator
- gate indicator
- alarm
Press the softkey Output to open the submenu below.
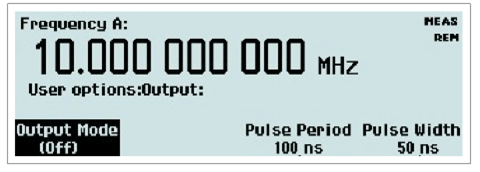
Off is the default mode and inhibits all activity on the output connector.
The pulse generator parameters Period and Width can be entered by first pressing the corresponding softkeys, then setting the numerical values as usual. By placing the cursor over the parameter, you can also set the values directly in 1-2-5 steps with the UP/DOWN arrow keys.
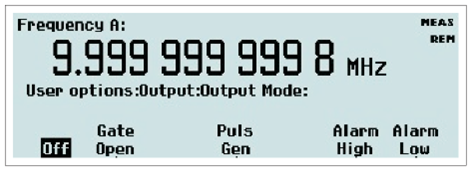
Press Output Mode to enter the mode selection menu below:
- Gate Open indicates to external equipment when a measurement is in progress.
- Pulse Generator activates a continuous pulse train having the parameters entered in the previous menu.
- Alarm can be set to be active low or active high. The MATH/LIM menu is used for setting up the behavior and the numerical limits that trigger the alarm.
The amplitude is fixed at TTL levels into 50 Ω irrespective of the output mode.
About
- Here you can find information on:
- model
- serial number
- instrument firmware version
- timebase option & calibration date
- The CNT-91R reports "Rubidium" in this field.
- RF input option
- The CNT-90XL reports the upper frequency limit.
Hold/Run
This key serves the purpose of manual arming. A pending measurement will be finished and the result will remain on the display until a new measurement is triggered by pressing the RESTART key.
Restart
Often this key is operated in conjunction with the HOLD/RUN key (see above), but it can also be used in free-running mode, especially when long measuring times are being used, e.g. to initiate a new measurement after a change in the input signal. RESTART will not affect any front panel settings.